If your binoculars look blurry, give you a headache or show dark edges, the problem is usually not the glass. It is the setup. Binoculars have to be adjusted to your face and your eyes before they can show a sharp, comfortable image, and most pairs arrive with little or no explanation. Many manufacturers do not even include instructions in the box.
The good news is that setting binoculars up takes a few minutes, and the part people find hardest, the diopter, normally only needs doing once. This guide covers the four things to adjust in order: the eyecups, the barrel width, the center focus wheel and the diopter. After that it explains how to focus quickly on a moving subject, how individual-focus and focus-free binoculars differ, how to hold them steady and what to do if something still looks wrong.
How do you focus binoculars?
Set the eyecups (up without glasses, down with glasses), then fold the hinge until you see one round image. Set the diopter to zero, cover the front lens on the diopter side, and focus on a distant sign with the center wheel. Then cover the other front lens and sharpen the image using only the diopter. After that, focus with the center wheel alone.
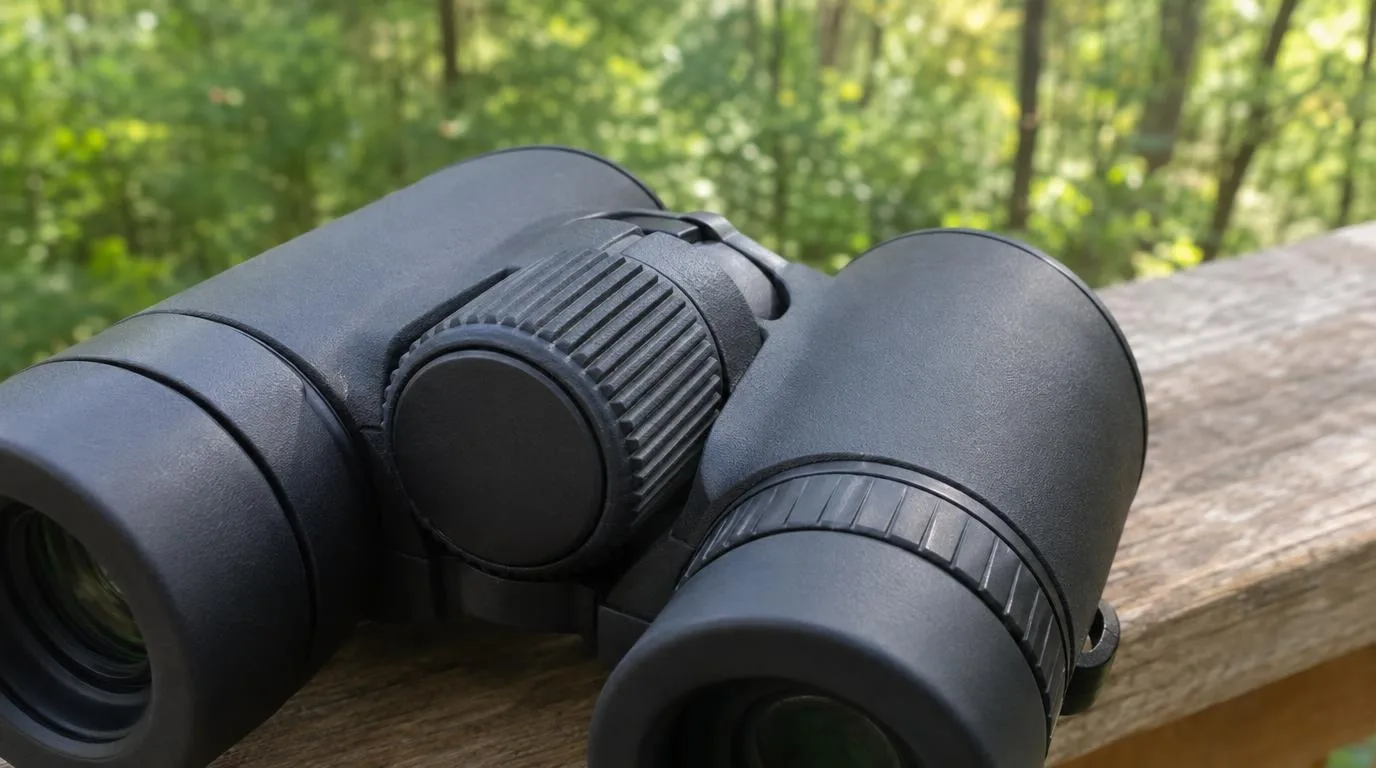
Know the controls first
| Control | What it does | Where to find it |
|---|---|---|
| Eyecups | Hold your eyes at the right distance from the eyepieces | Around each eyepiece; they twist up or fold down |
| Hinge | Sets the gap between the barrels to match your eyes | The center joint between the two barrels |
| Center focus wheel | Focuses both sides together for near or far subjects | Between the barrels, under your fingers |
| Diopter adjustment | Compensates for the difference between your two eyes | Usually below the right eyecup or on the center hinge, often marked from +2 to -2 |
Some binoculars, often marine models, have no center wheel at all. They are called individual-focus binoculars, and each eyepiece has its own focus ring. There is a section on them further down.
Step 1: Set the eyecups
The eyecups hold your eyes at the right distance from the eyepieces, a measurement known as eye relief, so that you see the whole image and block out stray light from the sides. If you do not wear glasses, extend the eyecups. If you do, fold or twist them all the way down, because your glasses already hold your eyes further back and let in side light anyway.
There are two common types. Twist-up eyecups click into set positions as you rotate them, and foldable rubber eyecups fold down or flip up. If you see a dark ring around the edge of the view, try a different position before you adjust anything else.
Step 2: Set the barrel width
Hold the binoculars up and look at something in the distance. Fold the barrels closer together or further apart until the two circles merge into one. If the width is wrong, you get black areas in the middle or at the edges of the view.
Binoculars with a small exit pupil are less forgiving here. Even a slight misalignment between the binoculars and your pupils can darken the view, so take a moment to get this step right, especially with compact models.
Step 3: Set the diopter to zero and choose a target
Turn the diopter ring to its zero or middle mark. On higher-end models the ring often has a lock: slide it up to release it before turning. Then choose a target some distance away with clean, crisp lines, such as a sign with letters or numbers, which is ideal because you can tell immediately when it is sharp.
Step 4: Focus one eye with the center wheel
Cover the front (objective) lens on the side that has the diopter, using the lens cap or your hand. Keep both eyes open, and turn the center focus wheel until the target is as sharp as you can get it. This sets the focus for your other eye, so take your time.
Step 5: Focus the other eye with the diopter
Now swap: uncover the diopter side and cover the other front lens. Without touching the center wheel, turn the diopter ring until the same target is sharp for this eye. This is the one step where the diopter, not the center wheel, does the work. It corrects for the fact that most people’s two eyes are not perfectly matched; without it, the image is sharp for one eye and soft for the other.
Step 6: Check, then note your setting
Uncover both lenses and look at the target with both eyes. It should be crisp and comfortable. Repeat the two focusing steps once or twice to be sure, then read the number on the diopter scale and write it down. The ring can be knocked out of place in normal use, so it is worth checking it each time you pick the binoculars up, and the note lets you put it back exactly where it should be.
If you wear glasses, the correction in your lenses reduces the difference between your eyes, which makes the diopter less critical. The setup still helps, but the result is usually less dramatic.
Focusing quickly in the field
Once the setup is done, you only need the center wheel. Speed comes from habit, and these tips help with moving subjects such as birds and wildlife:
- Find the subject with your naked eye first. Do not try to locate it through the binoculars. Keep your eyes on it, then lift the binoculars to your eyes without looking away.
- Turn the center wheel until the image is sharp. Practising on a still object a few times makes the movement automatic.
- Use a landmark. If there is something near your target, locate it with your eyes, find it in the binoculars, then move across to the target and refocus.
- Pre-focus when scanning. Focus on the far side of a lake or field, then pan slowly across it so the focus is already close when something appears.
Individual-focus and focus-free binoculars
Individual-focus (IF) binoculars have no center wheel. Each eyepiece has its own ring that moves the whole eyepiece unit. Close one eye, or cover one front lens, focus the open side, then repeat for the other. They are sturdy and easy to seal, which is why they have long been used for marine and military work, but refocusing for a different distance means adjusting both eyepieces again.
Focus-free or fixed-focus binoculars have no focusing mechanism apart from the eyepiece adjustment, which you set once. They are a convenience design, intended for subjects from roughly 35 m to infinity, and they are not well suited to anything closer. Some have no diopter at all, while others have an eyepiece adjustment that you set once for your eyes.
If you have zoom binoculars, one maker’s manual advises beginning the setup at the highest power, where focus errors are easiest to see, and then checking the lower powers.
Do you need to wear glasses?
Not always. If you are near-sighted or far-sighted, you can usually focus without glasses by turning the wheel a little further, because most binoculars have extra focusing range beyond the normal stops. People with significant astigmatism will still need to wear their glasses. If you do keep your glasses on, retract the eyecups fully (Step 1) and check that you can see the entire field.
Two methods, and where instructions differ
Instructions for the diopter vary in small ways, and it helps to know that the differences do not change the result.
- Covering a lens or closing an eye. Most guides, including the one we followed above, cover the front lens on one side and keep both eyes open. Others tell you to close the opposite eye instead. Either way, the aim is the same: each eye is focused on its own, one at a time.
- Distant or close target. Most instructions use something far away with crisp lines, such as a sign. One retailer suggests a stationary object that is fairly close, such as a branch or a pole. Either works, provided you use the same target for both eyes and finish by checking the result at a normal viewing distance.
- Starting position. Some guides begin with the diopter at zero, while the Cornell Lab’s video suggests either checking that it is centered or setting it for your eyes. Starting at zero is the clearest for a first-time setup, and it gives you a reference to return to.
If your result does not look right with one method, try the other. The important points are the same in both: use the center wheel for the first eye, the diopter for the second, and do not touch the center wheel in between.
Hold them steady
Even a perfectly focused pair looks soft if it is shaking. Hold the binoculars firmly, but not so tightly that your hands tremble. Rest your elbows against your body rather than raising your arms, and use the strap to avoid dropping them. If there is a tree, wall or railing nearby, lean on it or rest your elbows on it. For long observations of a stationary subject, a tripod helps, and high-magnification binoculars often need one.
Still not sharp? Troubleshooting
| What you see | Likely cause | What to do |
|---|---|---|
| Two circles or black areas | Barrel width does not match your eyes | Fold the hinge until you see one circle |
| Sharp in one eye, blurry in the other | Diopter not set for your eyes | Repeat Steps 3 to 5 |
| Dark ring around the edge | Eyecups at the wrong height | Retract them with glasses, extend them without |
| Image shakes | Unsteady grip | Rest your elbows against your body or a support |
| Cannot focus on something close | You are closer than the minimum focus distance | Step back; minimum focus ranges from about 0.5 m to 30 m depending on the model |
| Double image or eye strain that never goes away | Barrels out of alignment | Contact the manufacturer or a repair service; realignment needs special equipment |
| Smeared or hazy image | Dirty lenses | See our guide on how to clean binoculars |
Frequently asked questions
Which side is the diopter on?
Usually the right, below the right eyecup or on the center hinge. If yours is on the left, follow the same steps with the sides swapped: focus the side without the diopter first, using the center wheel.
Why are my binoculars still blurry after focusing?
Check the diopter first, since a ring knocked out of position makes one eye blurry. Then check for smudges on the lenses and make sure you are not closer than the minimum focus distance. If none of that helps and the image doubles or strains your eyes, the binoculars may be out of alignment and need servicing.
Can two people share one pair?
Yes. Each person notes their own diopter number and turns the ring to it when they take over. The barrel width usually needs adjusting too, because eye spacing varies from person to person.
What does the number on the diopter scale mean?
It shows how far the ring has moved from neutral, in diopters, the unit used for lens strength. Treat the number as a reference so you can return to your setting. Our guide to what the numbers on binoculars mean covers the other figures on your binoculars.
Final verdict
Set the eyecups and barrel width first, then focus one eye with the center wheel and the other with the diopter. That short routine fixes most blurry or uncomfortable views, and afterwards you only need the center wheel. Write down your diopter number, check it now and then, and if the image still doubles after a correct setup, let the manufacturer or a repair service look at it.
How we researched this guide
We compared the setup instructions published by binocular makers with guidance from birding organizations, and found that the steps agree. Where instructions differ between designs, such as center-focus and individual-focus binoculars, we explain each. The sources are listed below.
Sources
Read in November 2026.